Creating high-quality video content has become essential for businesses, social media influencers, and hobbyists alike. Whether you’re producing tutorials, marketing materials, or personal vlogs, editing your videos efficiently can make a huge difference in the final result. Two tools that have gained significant attention in recent years are the video trimmer and video editor free solutions. These tools simplify the editing process, making it accessible to everyone, regardless of experience.
In this article, we’ll explore how these tools work, their key benefits, and tips to use them effectively to create engaging content.
Understanding the basics of video editing
Video editing is the process of manipulating and rearranging video shots to create a cohesive and polished final product. At its core, editing involves cutting unwanted sections, adding effects or transitions, and refining the overall presentation.
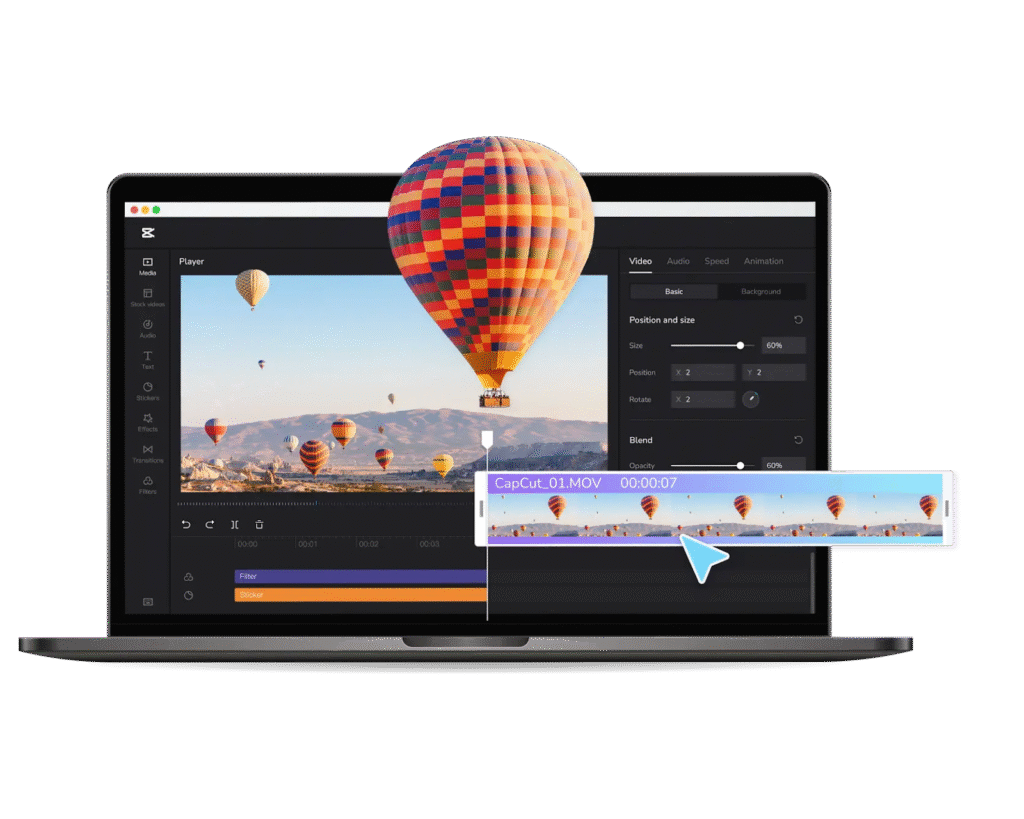
While professional-grade software can be expensive and complex, modern video editor free tools offer an easy entry point for beginners. They often include essential features like trimming, cropping, adding text, and basic color correction without requiring advanced technical skills.
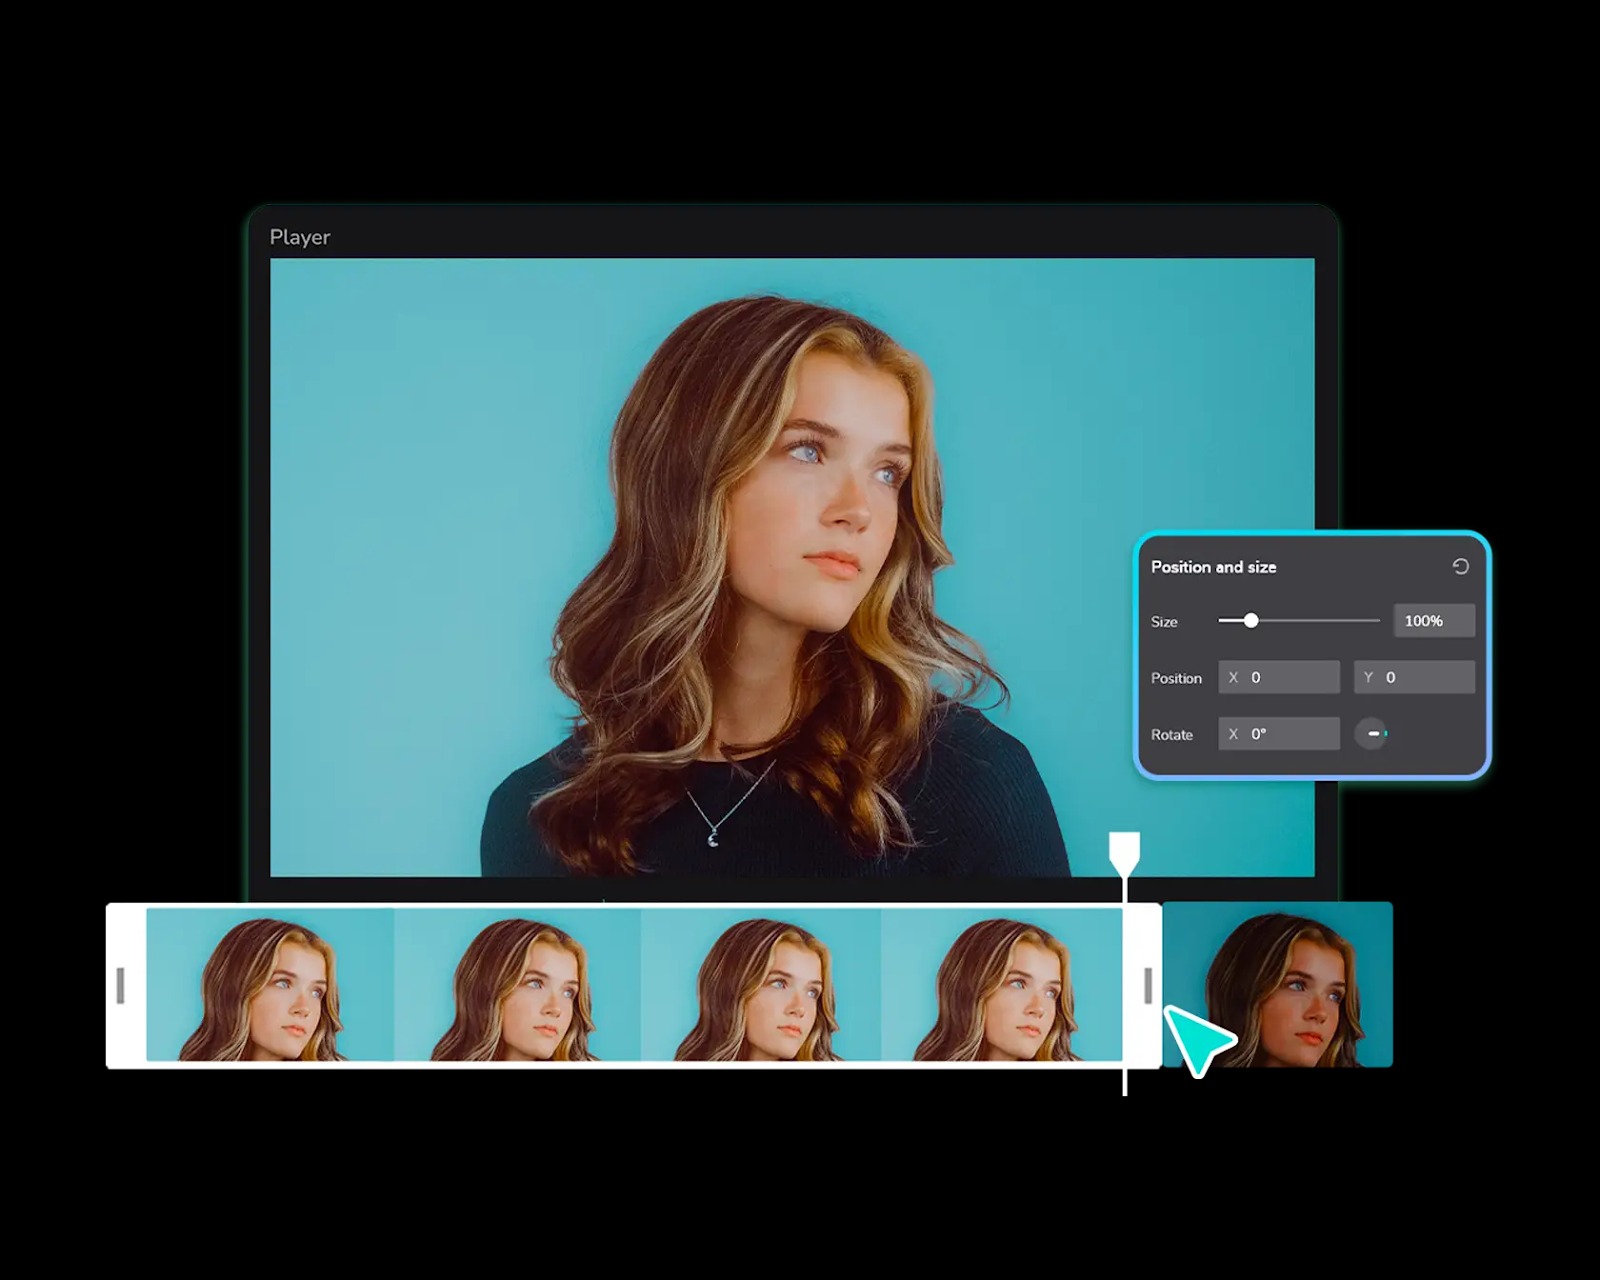
One of the most fundamental tools in any editor is the video trimmer. As the name suggests, a video trimmer allows users to cut down video clips to their essential parts. This helps remove unnecessary footage, shorten long segments, and maintain the viewer’s attention throughout the video.
Why a video trimmer is essential
When creating videos, every second counts. A lengthy, unedited video can quickly lose audience engagement. This is where a video trimmer becomes invaluable.
Precise editing
A video trimmer allows you to make precise cuts at specific timestamps, removing irrelevant or redundant parts of the video. This is especially useful for tutorials, webinars, or live recordings where pauses or mistakes need to be eliminated.
Improved viewer engagement
Shorter, more focused videos keep viewers engaged. A cluttered or overly long video can frustrate audiences, causing them to skip parts or abandon the video entirely. By trimming out unnecessary segments, your content becomes more appealing and professional.
Efficient workflow
Using a video trimmer speeds up the editing process. Instead of spending hours navigating complex software, a trimmer lets you quickly isolate the portions you need. This efficiency is especially beneficial for content creators who produce multiple videos in a short timeframe.
Exploring video editor free options
Not everyone has the budget for premium software like Adobe Premiere Pro or Final Cut Pro. Fortunately, there are numerous video editor free options that offer impressive features without any cost.
Accessibility for beginners
Free video editors are designed with simplicity in mind. Many come with drag-and-drop interfaces, making it easy to arrange clips, add transitions, and include text or music. Even users with no prior experience can start editing videos quickly.
Feature-rich tools
While these editors are free, they often provide a wide range of features. Some include:
- Video trimming and splitting: Essential for cutting out unnecessary footage.
- Audio editing: Adjust volume, remove noise, or add background music.
- Transitions and effects: Make your videos more engaging with smooth visual effects.
- Export options: Save videos in various formats and resolutions.
Using a video editor free tool in combination with a video trimmer gives creators a complete editing solution without investing in expensive software.
Tips for using a video trimmer effectively
While trimming may sound simple, doing it efficiently requires some strategy. Here are some tips to make the most of your video trimmer:
Identify key moments
Before trimming, watch your video and mark the sections that are essential to your story. Highlight moments that contribute to the narrative or contain valuable information. This ensures that only unnecessary footage is removed.
Maintain smooth transitions
Cutting too abruptly can make a video feel jarring. Use your trimmer to make smooth transitions between scenes. Many tools allow you to add fade-ins, fade-outs, or crossfades to maintain a professional flow.
Keep audience engagement in mind
Always consider your viewers’ experience. Remove repetitive content or long pauses that may bore your audience. The goal is to deliver a concise, engaging video that retains viewers from start to finish.
Combining a video trimmer and video editor free
Using a video trimmer alongside a video editor free tool creates a powerful editing workflow. Here’s how you can combine them effectively:
Step 1: Initial trimming
Start by using the video trimmer to cut out any unnecessary footage. Focus on removing mistakes, long pauses, or off-topic segments. This ensures that you are working with only the content that matters.
Step 2: Editing enhancements
Once the video is trimmed, import it into your video editor free. Enhance your footage with transitions, text overlays, music, or color adjustments. This step elevates your video from raw content to polished material.
Step 3: Export and review
After editing, export your video in the desired format and resolution. Review the final output to ensure smooth transitions and clear audio. Making minor adjustments at this stage can significantly improve the overall quality.
Benefits of using free tools for video creation
Choosing a free video editor combined with a dedicated trimmer comes with several advantages:
Cost-effective solution
For creators on a budget, free tools eliminate the need for expensive subscriptions or software licenses. This makes video editing accessible to anyone, whether you’re a hobbyist or a small business owner.
Low learning curve
Free tools are often simpler and more intuitive than professional software. This allows beginners to learn video editing quickly, without feeling overwhelmed by complex menus or features.
Flexibility and creativity
Despite being free, these tools often provide enough features to unleash your creativity. You can experiment with effects, transitions, and audio enhancements without limitations, producing professional-looking content at no cost.
Choosing the right video editor free
Not all free video editors are created equal. Here are some criteria to consider when selecting a tool:
- Ease of use: Look for a user-friendly interface that makes editing straightforward.
- Compatibility: Ensure it supports your operating system and preferred video formats.
- Feature set: Check for essential features like trimming, text overlays, and audio editing.
- Export options: Consider whether the editor allows high-resolution exports without watermarks.
Popular choices often recommended by creators include OpenShot, Shotcut, and DaVinci Resolve’s free version. Each offers a combination of trimming, editing, and enhancement tools suitable for a wide range of projects.
Final thoughts
Video editing doesn’t have to be complicated or expensive. A video trimmer paired with a video editor free provides a complete solution for creating high-quality content efficiently. These tools empower creators to cut unnecessary footage, enhance visuals, and produce professional videos without breaking the bank.
By understanding the basics of trimming, exploring free editing options, and applying practical tips, anyone can improve their video production process. Whether you’re sharing content online, creating marketing materials, or recording personal projects, mastering these tools will elevate your videos and engage your audience effectively.
Investing time in learning how to use a trimmer and free editor can save hours in post-production and improve the overall impact of your videos. Start experimenting today, and you’ll soon see how even small edits can make a significant difference.